Home Blog Page 10

Eco-Friendly Home Decorating Ideas

0

Decorating your home in an eco-friendly way is not only good for the environment but also allows you to create a beautiful, healthy, and sustainable living space. With growing awareness of environmental issues, many homeowners are seeking ways to reduce their carbon footprint and make more responsible choices in their home decor. From using sustainable materials to upcycling old furniture, there are countless ways to design a stylish and eco-conscious home. Here are some eco-friendly home decorating ideas that will help you create a space that is both beautiful and kind to the planet.

1. Choose Sustainable Materials

One of the most effective ways to decorate your home in an eco-friendly manner is by choosing sustainable materials. These materials are sourced and manufactured in ways that have a minimal impact on the environment.

  • Bamboo: Bamboo is a fast-growing, renewable resource that is ideal for flooring, furniture, and even wall coverings. Its durability and versatility make it a popular choice for eco-friendly home decor.
  • Reclaimed Wood: Using reclaimed wood is a great way to add character to your home while reducing the demand for new timber. Reclaimed wood can be used for furniture, flooring, and accent walls, and each piece has a unique history and appearance.
  • Cork: Cork is another sustainable material that is harvested from the bark of cork oak trees. It is often used for flooring, wall tiles, and accessories. Cork is naturally hypoallergenic, moisture-resistant, and provides excellent insulation.
  • Organic Cotton and Linen: When choosing textiles for your home, opt for organic cotton and linen. These fabrics are made from natural fibers that are grown without the use of harmful pesticides and chemicals, making them safer for both the environment and your family.

2. Upcycle and Repurpose Furniture

Upcycling and repurposing old furniture is a creative and eco-friendly way to decorate your home. By giving new life to old or discarded items, you reduce waste and minimize the need for new resources.

  • Refinish Old Furniture: Instead of buying new furniture, consider refinishing or repainting old pieces to give them a fresh look. A coat of non-toxic, low-VOC paint can transform a worn-out dresser or table into a stylish focal point in your home.
  • Repurpose Vintage Finds: Visit thrift stores, flea markets, or garage sales to find unique vintage pieces that can be repurposed. For example, an old ladder can be turned into a bookshelf, or a vintage suitcase can be converted into a side table or storage box.
  • DIY Projects: Get creative with DIY projects that allow you to repurpose materials you already have. For instance, you can use old wooden pallets to create a rustic coffee table or headboard, or turn glass jars into chic storage containers or candle holders.

3. Use Eco-Friendly Paints and Finishes

Traditional paints and finishes can release harmful volatile organic compounds (VOCs) into the air, contributing to indoor air pollution and health problems. Choosing eco-friendly alternatives helps create a healthier living environment.

  • Low-VOC and Zero-VOC Paints: Opt for low-VOC or zero-VOC paints that emit fewer toxic chemicals into the air. These paints are available in a wide range of colors and finishes, making it easy to find the perfect shade for your home.
  • Natural Finishes: For wood furniture and floors, choose natural finishes like beeswax, tung oil, or linseed oil. These finishes are derived from natural sources and are free from harmful chemicals, providing a safe and sustainable option for protecting and enhancing wood surfaces.
  • Milk Paint: Milk paint is a natural, biodegradable paint made from milk protein, lime, and natural pigments. It has been used for centuries and provides a beautiful, matte finish that is perfect for creating a vintage or rustic look.

4. Incorporate Energy-Efficient Lighting

Lighting is a crucial element of home decor, and making energy-efficient choices can significantly reduce your home’s energy consumption and carbon footprint.

  • LED Bulbs: Replace traditional incandescent bulbs with LED bulbs, which use up to 80% less energy and last much longer. LED bulbs are available in a variety of color temperatures and styles, making them suitable for any room in your home.
  • Solar-Powered Lights: For outdoor spaces, consider using solar-powered lights. These lights harness energy from the sun during the day and provide illumination at night without the need for electricity.
  • Dimmer Switches: Installing dimmer switches allows you to adjust the brightness of your lights, reducing energy consumption and extending the life of your bulbs. Dimmer switches also create a cozy, inviting atmosphere in your home.

5. Opt for Eco-Friendly Flooring

Flooring is a major component of home decor, and choosing eco-friendly options can have a positive impact on both your home and the environment.

  • Bamboo Flooring: As mentioned earlier, bamboo is a sustainable and durable option for flooring. It has a similar appearance to hardwood and is available in a variety of finishes.
  • Cork Flooring: Cork is another eco-friendly flooring option that is soft underfoot, provides excellent insulation, and is naturally resistant to mold and mildew.
  • Recycled Materials: Consider flooring made from recycled materials, such as reclaimed wood, recycled glass tiles, or rubber flooring made from recycled tires. These materials reduce waste and offer unique design possibilities.
  • Wool Carpets: If you prefer carpet, choose wool, a natural and renewable fiber. Wool carpets are durable, naturally stain-resistant, and biodegradable.

6. Decorate with Plants

Indoor plants are a wonderful way to bring nature into your home, improve air quality, and enhance your decor.

  • Air-Purifying Plants: Some plants are particularly effective at purifying indoor air by removing toxins and pollutants. Popular air-purifying plants include spider plants, peace lilies, snake plants, and aloe vera.
  • Succulents and Cacti: Succulents and cacti are low-maintenance plants that add texture and interest to your decor. They thrive in bright light and require minimal watering, making them ideal for busy homeowners.
  • Herb Gardens: Create a small indoor herb garden in your kitchen. Fresh herbs like basil, mint, and rosemary not only add greenery to your space but also provide fresh ingredients for cooking.

7. Choose Eco-Friendly Textiles

Textiles play a significant role in home decor, from curtains and rugs to bedding and cushions. Choosing eco-friendly textiles helps reduce your environmental impact and promotes a healthier living space.

  • Organic Cotton: Organic cotton is grown without the use of synthetic pesticides or fertilizers, making it a more sustainable and eco-friendly option for bedding, towels, and upholstery.
  • Linen: Linen is a natural fiber made from the flax plant. It requires less water and pesticides to grow compared to cotton and is biodegradable. Linen is known for its durability, breathability, and timeless appeal.
  • Recycled Fabrics: Look for textiles made from recycled materials, such as rugs made from recycled plastic bottles or cushions filled with recycled polyester. These products help reduce waste and conserve resources.
  • Natural Dyes: Choose textiles dyed with natural, plant-based dyes instead of synthetic dyes, which can contain harmful chemicals. Natural dyes offer beautiful, earthy colors and are better for the environment.

8. Invest in Sustainable Furniture

When purchasing new furniture, consider investing in sustainable options that are made from eco-friendly materials and produced with minimal environmental impact.

  • Certified Sustainable Wood: Look for furniture made from wood that is certified by organizations like the Forest Stewardship Council (FSC), which ensures that the wood is sourced from responsibly managed forests.
  • Recycled and Reclaimed Materials: Choose furniture made from recycled or reclaimed materials, such as reclaimed wood, recycled metal, or repurposed plastic. These pieces often have unique character and contribute to a more sustainable home.
  • Modular and Multi-Functional Furniture: Opt for modular and multi-functional furniture that can be easily reconfigured or adapted to suit your changing needs. This reduces the need to purchase new furniture and extends the life of your existing pieces.

9. Reduce, Reuse, Recycle

One of the core principles of eco-friendly living is to reduce waste by reusing and recycling whenever possible.

  • Reduce: Be mindful of your consumption and avoid purchasing unnecessary items. Choose quality over quantity, and invest in pieces that are durable and timeless rather than trendy and disposable.
  • Reuse: Before buying new items, consider whether you can reuse or repurpose something you already have. For example, old jars can be reused as storage containers, and fabric scraps can be turned into decorative pillows or wall art.
  • Recycle: When it’s time to replace or dispose of old items, make sure to recycle them properly. Many communities offer recycling programs for furniture, electronics, and textiles. Consider donating usable items to charity or giving them a new life through upcycling.

Conclusion

Creating an eco-friendly home doesn’t mean sacrificing style or comfort. By choosing sustainable materials, upcycling old furniture, incorporating plants, and making mindful purchasing decisions, you can design a beautiful and environmentally responsible living space. These eco-friendly home decorating ideas not only reduce your carbon footprint but also contribute to a healthier, more sustainable lifestyle. As more people embrace green living, eco-friendly home decor is becoming increasingly accessible and diverse, allowing you to create a home that reflects your values and supports the planet.


The Cost of Home Painting Services: What to Expect

0

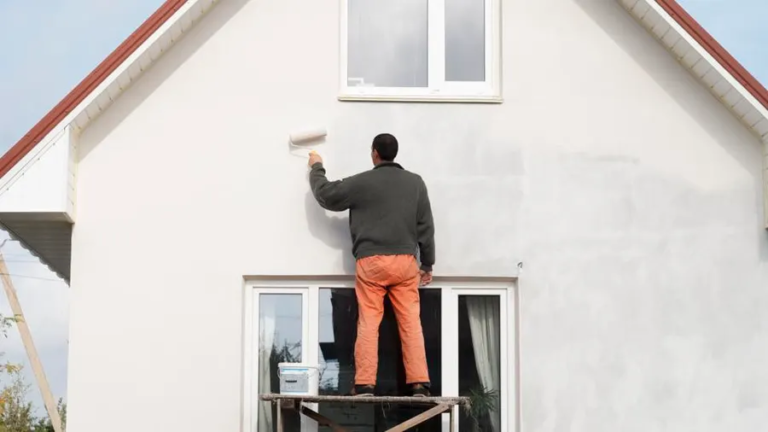
Painting your home is one of the most effective ways to refresh its appearance, increase its value, and protect it from the elements. Whether you’re considering a fresh coat for the interior or exterior, understanding the cost of home painting services is crucial for budgeting and making informed decisions. The price of painting services can vary widely depending on several factors, including the size of your home, the complexity of the job, the quality of materials used, and the labor involved. This comprehensive guide will help you understand what to expect when budgeting for home painting services.

1. Factors Influencing the Cost of Home Painting Services

Several factors can influence the cost of painting your home. Understanding these factors will help you estimate the overall expense and make informed decisions when selecting a painting service.

  • Size of the Area to Be Painted: The most significant factor affecting the cost is the size of the area to be painted. This is typically measured in square feet. Larger homes or rooms will require more paint and more labor, which will increase the cost. For exterior painting, the total square footage of the exterior walls is considered, while for interior painting, the surface area of the walls and ceilings is measured.
  • Type of Paint and Quality: The type and quality of paint you choose will also impact the cost. High-quality paints with better coverage, durability, and resistance to weather and wear are more expensive but may save you money in the long run by lasting longer and requiring fewer coats. Premium paints can cost between $30 and $70 per gallon, while lower-quality paints may be priced between $20 and $30 per gallon.
  • Preparation Work: Before painting can begin, the surface needs to be properly prepared. This may include washing walls, scraping off old paint, repairing cracks or holes, sanding, and priming. The extent of preparation work required will affect the overall cost. Homes with significant damage or those requiring extensive preparation will incur higher costs.
  • Number of Coats: The number of coats required depends on the color change and the condition of the existing paint. Darker colors often need more coats to cover, and some surfaces may require a primer before applying the topcoat. More coats mean more paint and more labor, which increases the overall cost.
  • Labor Costs: Labor is a significant part of the cost of painting services. Professional painters charge either by the hour or by the square foot. Labor costs can vary depending on the complexity of the job, the painter’s experience, and the region. On average, labor costs range from $20 to $50 per hour or $2 to $6 per square foot.
  • Location: The cost of painting services can vary depending on your location. Urban areas with a higher cost of living typically have higher labor rates. Additionally, accessibility issues, such as painting a home in a remote location or dealing with difficult terrain, can increase costs.

2. Cost of Interior Painting

Interior painting is a popular home improvement project that can dramatically change the look and feel of your home. Here’s what you can expect to pay for interior painting services.

  • Cost per Room: The cost of painting a single room typically ranges from $300 to $1,000, depending on the room’s size and the complexity of the job. Smaller rooms like bathrooms may cost less, while larger rooms like living rooms or master bedrooms may cost more. The cost includes labor, materials, and basic prep work.
  • Cost per Square Foot: For a more detailed estimate, interior painting costs are often calculated per square foot. The average cost ranges from $2 to $6 per square foot. This includes the cost of paint, materials, and labor. High-end finishes or specialty paint effects, like textured walls or murals, can increase the cost per square foot.
  • Additional Costs: Additional costs may apply for extra features like painting ceilings, trim, doors, or windows. For example, painting trim and baseboards typically costs an additional $1 to $3 per linear foot. Ceilings may add another $1 to $2 per square foot to the total cost. Painting cabinets or intricate woodwork can also increase costs due to the additional time and detail work required.

3. Cost of Exterior Painting

Exterior painting not only improves your home’s curb appeal but also provides a protective layer against weather and environmental damage. Exterior painting generally costs more than interior painting due to the larger area and the need for more durable paint.

  • Cost per Square Foot: The cost of exterior painting is typically calculated by the square foot and ranges from $1.50 to $4 per square foot. This price includes labor, materials, and basic preparation work. Homes with multiple stories, intricate architectural details, or extensive prep work (such as repairing damaged siding) can expect to pay on the higher end of this range.
  • Cost by Home Size: For a more general estimate, the cost of painting the exterior of an average-sized home (1,500 to 2,500 square feet) ranges from $3,000 to $8,000. Smaller homes or those with minimal prep work may be less expensive, while larger homes or those requiring extensive repairs will be more costly.
  • Type of Siding: The type of siding on your home can also impact the cost. For example, painting wood siding is generally less expensive than painting stucco or brick, which may require special primers or additional coats of paint. Vinyl siding, on the other hand, may not need painting at all, or it might require special paint designed to adhere to plastic surfaces.

4. Cost of Painting Different Materials

Different materials require different types of paint and preparation, which can affect the cost of the project. Here’s a breakdown of the costs associated with painting various materials.

  • Wood: Wood is one of the most common materials for both interior and exterior surfaces. The cost of painting wood typically ranges from $1.50 to $4 per square foot, depending on the type of wood, the condition of the surface, and the type of paint used. Exterior wood surfaces may require additional prep work, such as sanding or priming, to ensure proper adhesion and durability.
  • Brick and Masonry: Painting brick or masonry surfaces can be more expensive due to the porous nature of the material and the need for special primers. The cost typically ranges from $2 to $6 per square foot. In addition, brick surfaces may require power washing before painting to remove dirt and debris, adding to the overall cost.
  • Stucco: Stucco is a common exterior finish that requires special paint and preparation. The cost of painting stucco ranges from $1.50 to $5 per square foot. Stucco surfaces often need to be patched or repaired before painting, which can increase the overall cost. Additionally, the texture of stucco may require more paint to achieve even coverage.
  • Metal: Metal surfaces, such as metal siding, railings, or gutters, require special paint that adheres well to metal and resists rust. The cost of painting metal typically ranges from $2 to $5 per square foot. Preparation work, such as sanding or priming, is often required to ensure proper adhesion and prevent rust.

5. DIY vs. Professional Painting Services

Many homeowners consider tackling painting projects themselves to save money. While DIY painting can be cost-effective, it’s important to consider the time, effort, and potential risks involved.

  • DIY Costs: The cost of a DIY painting project includes the cost of paint, materials (such as brushes, rollers, and drop cloths), and any necessary prep work. On average, DIY painting costs range from $1 to $3 per square foot. While this is less expensive than hiring a professional, it doesn’t include the value of your time or the potential cost of mistakes.
  • Professional Services: Hiring professional painters offers several advantages, including expertise, efficiency, and high-quality results. Professionals have the skills and equipment to handle all aspects of the job, from preparation to clean-up. While the cost of hiring professionals is higher, typically ranging from $2 to $6 per square foot, the results are often more durable and visually appealing.
  • Time and Effort: Consider the time and effort required for a DIY project. Painting a single room can take several days, including preparation and clean-up. For larger projects, such as painting an entire home, the time commitment can be significant. Hiring professionals can save you time and ensure the job is done correctly.

6. Tips for Saving on Painting Costs

While painting services can be a significant investment, there are ways to save money without sacrificing quality.

  • Get Multiple Quotes: Before hiring a painter, get multiple quotes from different contractors. This allows you to compare prices and services and choose the best option for your budget.
  • Plan Ahead: Planning your project during the off-season (typically winter) can result in lower prices, as painters may offer discounts during slower periods.
  • Do Some Prep Work Yourself: If you’re comfortable with it, doing some of the preparation work yourself, such as moving furniture, cleaning surfaces, or patching small holes, can reduce labor costs.
  • Choose Quality Over Quantity: Invest in high-quality paint that offers better coverage and durability. While it may be more expensive upfront, it will save you money in the long run by lasting longer and requiring fewer touch-ups.

Conclusion

The cost of home painting services can vary widely depending on several factors, including the size of the area to be painted, the quality of materials used, and the complexity of the job. Whether you’re painting the interior or exterior of your home, understanding these costs will help you budget effectively and make informed decisions. While DIY painting can be a cost-effective option, hiring professional painters often results in higher-quality, longer-lasting results.

Understanding the Costs of Different Flooring Materials

0

Choosing the right flooring for your home involves more than just selecting the most visually appealing option. The cost of flooring materials can vary significantly depending on factors such as material type, installation complexity, durability, and maintenance requirements. Understanding these costs can help you make an informed decision that aligns with your budget and meets your needs. This guide breaks down the costs of various flooring materials, offering insights into what you can expect when planning your next flooring project.

1. Hardwood Flooring

Hardwood flooring is a popular choice for its timeless beauty, durability, and ability to increase the value of a home. However, it is also one of the more expensive flooring options available.

  • Material Costs: The cost of hardwood flooring typically ranges from $6 to $12 per square foot, depending on the type of wood. Common choices include oak, maple, and cherry, with exotic woods like mahogany or Brazilian walnut costing significantly more. Engineered hardwood, which is made of a hardwood veneer over a plywood core, can be a more affordable option, usually ranging from $4 to $8 per square foot.
  • Installation Costs: Professional installation of hardwood flooring adds $3 to $5 per square foot to the total cost. Installation costs can increase if the subfloor needs preparation or if the room has an irregular shape that requires additional cutting and fitting.
  • Maintenance Costs: Hardwood floors require regular maintenance, including cleaning, polishing, and occasional refinishing. Refinishing, which involves sanding down the surface and applying a new finish, can cost between $2 and $4 per square foot.

Total Cost: On average, expect to pay between $9 and $17 per square foot for hardwood flooring, including installation. High-end hardwoods and complex installations can push this cost higher.

2. Laminate Flooring

Laminate flooring is a budget-friendly alternative to hardwood that mimics the look of wood, stone, or tile. It’s made of a high-density fiberboard core with a photographic layer that simulates the desired material.

  • Material Costs: Laminate flooring is relatively affordable, with prices ranging from $1 to $6 per square foot. The cost varies depending on the quality of the laminate and the authenticity of the design. Higher-end laminates that closely mimic the appearance of natural wood or stone are more expensive.
  • Installation Costs: Laminate flooring is designed for easy installation, often using a click-and-lock system that doesn’t require nails or glue. Professional installation typically costs between $2 and $4 per square foot, making it more affordable than hardwood.
  • Maintenance Costs: Laminate flooring is low-maintenance, requiring only regular sweeping and occasional damp mopping. It doesn’t need refinishing, but it can’t be repaired easily if damaged, so replacing damaged sections may be necessary.

Total Cost: Including installation, the total cost of laminate flooring typically ranges from $3 to $10 per square foot, making it an economical choice for homeowners on a budget.

3. Vinyl Flooring

Vinyl flooring has evolved significantly over the years and is now available in a wide range of styles, including luxury vinyl planks (LVP) and luxury vinyl tiles (LVT), which closely mimic the appearance of hardwood and stone.

  • Material Costs: The cost of vinyl flooring varies widely depending on the type and quality. Standard sheet vinyl costs between $1 and $3 per square foot, while luxury vinyl planks or tiles range from $2 to $7 per square foot.
  • Installation Costs: Installation costs for vinyl flooring are generally lower than for other materials, ranging from $1 to $4 per square foot. Vinyl is relatively easy to install, and many homeowners choose to install it themselves to save on labor costs.
  • Maintenance Costs: Vinyl flooring is low-maintenance and highly durable. It’s resistant to water, stains, and scratches, making it ideal for high-traffic areas. Regular sweeping and occasional mopping are all that’s needed to keep it looking good.

Total Cost: The total cost of vinyl flooring, including installation, typically ranges from $2 to $11 per square foot, depending on the type and quality of the material.

4. Tile Flooring

Tile flooring, including ceramic, porcelain, and natural stone, offers a wide range of design possibilities and is known for its durability and water resistance.

  • Material Costs: The cost of tile flooring varies greatly depending on the material. Ceramic tiles generally cost between $1 and $5 per square foot, while porcelain tiles, which are denser and more durable, range from $3 to $10 per square foot. Natural stone tiles, such as marble, granite, or travertine, can cost anywhere from $5 to $15 per square foot or more.
  • Installation Costs: Tile installation is labor-intensive, which is reflected in the installation costs. Professional installation typically costs between $5 and $10 per square foot, depending on the complexity of the pattern and the type of tile. Natural stone tiles may require specialized installation, increasing the overall cost.
  • Maintenance Costs: Tile flooring is relatively low-maintenance but may require regular sealing, especially for natural stone tiles, to prevent staining and water damage. Grout lines should also be cleaned and sealed periodically to maintain their appearance and integrity.

Total Cost: Including installation, the total cost of tile flooring ranges from $6 to $25 per square foot, depending on the type of tile and the complexity of the installation.

5. Carpet Flooring

Carpet remains a popular choice for bedrooms, living rooms, and other areas where comfort and warmth underfoot are priorities.

  • Material Costs: The cost of carpet varies based on the material, thickness, and quality. Basic synthetic carpets like polyester or olefin can cost as little as $1 to $3 per square foot, while higher-end options like nylon or wool range from $4 to $12 per square foot.
  • Installation Costs: Professional carpet installation typically costs between $1 and $4 per square foot. This cost includes the installation of carpet padding, which adds comfort and extends the life of the carpet. Additional costs may apply if the subfloor requires preparation or if old carpeting needs to be removed.
  • Maintenance Costs: Carpet requires regular vacuuming and periodic deep cleaning to remove dirt, allergens, and stains. Professional carpet cleaning services generally cost between $100 and $300 per visit, depending on the size of the area being cleaned.

Total Cost: The total cost of carpet flooring, including installation, typically ranges from $3 to $16 per square foot, depending on the quality of the carpet and the complexity of the installation.

6. Bamboo Flooring

Bamboo flooring is an eco-friendly alternative to traditional hardwood, known for its durability and sustainability. It’s available in various styles, including solid, engineered, and strand-woven bamboo.

  • Material Costs: Bamboo flooring generally costs between $3 and $8 per square foot. Strand-woven bamboo, which is the most durable option, tends to be on the higher end of this price range.
  • Installation Costs: Professional installation of bamboo flooring typically costs between $3 and $5 per square foot. Installation costs can vary depending on the complexity of the job and the type of bamboo flooring chosen.
  • Maintenance Costs: Bamboo flooring is relatively low-maintenance, requiring regular sweeping and occasional damp mopping. It’s more resistant to moisture than hardwood, but spills should still be cleaned up promptly to prevent damage.

Total Cost: The total cost of bamboo flooring, including installation, typically ranges from $6 to $13 per square foot, making it a moderately priced option for eco-conscious homeowners.

7. Cork Flooring

Cork flooring is another eco-friendly option that offers unique benefits such as natural cushioning, insulation, and sound absorption. It’s made from the bark of the cork oak tree, which can be harvested without harming the tree.

  • Material Costs: Cork flooring generally costs between $3 and $7 per square foot. The cost can vary depending on the thickness, quality, and brand.
  • Installation Costs: Installation of cork flooring typically costs between $2 and $4 per square foot. Cork flooring can be installed as floating floors or glued down, with floating installations usually being more affordable.
  • Maintenance Costs: Cork flooring requires regular sweeping and damp mopping. It’s important to use pH-balanced cleaning products to avoid damaging the cork. Cork floors should also be sealed periodically to protect against moisture and wear.

Total Cost: Including installation, the total cost of cork flooring ranges from $5 to $11 per square foot, making it a cost-effective option for those seeking a sustainable and comfortable flooring material.

Conclusion

When choosing flooring for your home, it’s important to consider not only the upfront costs but also the long-term expenses associated with maintenance and potential repairs. Each flooring material has its advantages and price points, so your decision should be based on your budget, lifestyle, and the specific needs of each room in your home. Whether you opt for the luxury of hardwood, the affordability of laminate, or the eco-friendliness of bamboo or cork, understanding the costs involved will help you make a choice that adds value and comfort to your home.

r-lasting results.

The Impact of Weather on Your Roof: What to Watch Out For

0

Your roof is one of the most critical components of your home, providing protection against the elements and ensuring the structural integrity of the building. However, it’s also one of the most vulnerable parts of your house, constantly exposed to various weather conditions that can cause damage over time. Understanding how different weather conditions impact your roof and what to watch out for can help you take proactive measures to maintain and protect your roof, ultimately extending its lifespan and saving you from costly repairs. Here’s a comprehensive guide to the impact of weather on your roof and what you should keep an eye on.

1. Sun and UV Radiation

While sunshine might seem harmless, the constant exposure to ultraviolet (UV) radiation from the sun can have a significant impact on your roof. Over time, UV rays can cause the materials on your roof to degrade, leading to a variety of problems.

  • Shingle Deterioration: Asphalt shingles, in particular, are susceptible to UV damage. Prolonged exposure can cause the oils in the shingles to dry out, leading to cracking, brittleness, and eventually, the loss of protective granules. This not only affects the appearance of your roof but also reduces its ability to protect your home from the elements.
  • Fading: UV radiation can cause the color of your roofing materials to fade over time, leading to a less attractive appearance. While this is primarily a cosmetic issue, it can also indicate the beginning of more serious deterioration.
  • Thermal Expansion and Contraction: Constant exposure to heat causes roofing materials to expand, and when the temperature drops, they contract. This repeated cycle can cause materials to weaken, warp, or crack, particularly in roofs with metal components.

What to Watch Out For: Look for signs of cracking, curling, or missing shingles. Also, pay attention to any areas where the roof’s color appears faded or uneven. Regularly inspect the roof for loose or exposed nails, which can be a result of thermal expansion and contraction.

2. Rain and Water Damage

Water is one of the most common causes of roof damage, particularly during heavy rainfall. While roofs are designed to keep water out, prolonged exposure to moisture can lead to a range of problems, especially if the roof is already compromised.

  • Leaks: One of the most obvious signs of water damage is a leak. Water can seep through even the smallest cracks or gaps in your roof, leading to leaks that can damage the interior of your home, including the ceilings, walls, and insulation.
  • Mold and Mildew Growth: Moisture trapped in your roof or attic can create the perfect environment for mold and mildew to thrive. This not only damages the structure of your home but can also lead to health problems for your family.
  • Rotting Wood: Prolonged exposure to moisture can cause the wooden components of your roof, such as the decking and rafters, to rot. This weakens the overall structure of your roof and can lead to sagging or even collapse if not addressed.

What to Watch Out For: Regularly check for signs of water damage, such as dark spots on the ceiling, peeling paint, or musty odors. Inspect your attic for signs of mold or mildew, and ensure that your gutters and downspouts are clear of debris to prevent water from pooling on the roof.

3. Wind Damage

Strong winds can cause significant damage to your roof, particularly during storms or hurricanes. Wind can lift shingles, break tree branches that fall onto your roof, and even rip off entire sections of the roof if the wind is strong enough.

  • Shingle Damage: High winds can lift and curl shingles, breaking the seal that keeps them in place. Once the shingles are lifted, wind-driven rain can easily penetrate the roof, leading to leaks and water damage.
  • Debris Impact: Wind can carry debris, such as branches, leaves, and other objects, which can hit your roof and cause damage. Larger debris, like fallen trees, can cause severe damage, including punctures or structural damage.
  • Edge and Corner Vulnerability: The edges and corners of your roof are particularly vulnerable to wind damage. If the wind gets underneath the shingles in these areas, it can lift them and peel them back, exposing the underlayment and the roof structure to the elements.

What to Watch Out For: After a storm, inspect your roof for missing, loose, or damaged shingles. Check for debris on the roof and in the gutters, as this can indicate potential damage. Pay special attention to the edges and corners of the roof, as these areas are more likely to be affected by wind.

4. Snow and Ice

In colder climates, snow and ice can have a major impact on your roof. The weight of accumulated snow, the formation of ice dams, and the freeze-thaw cycle can all lead to serious problems.

  • Ice Dams: Ice dams occur when snow on the roof melts due to heat escaping from the attic, then refreezes at the roof’s edge. This creates a dam that prevents water from draining off the roof. As a result, water can back up under the shingles and leak into the home.
  • Heavy Snow Load: The weight of heavy snow can put significant stress on your roof, especially if the snow is wet and heavy. This can cause the roof to sag, and in extreme cases, lead to structural failure.
  • Freeze-Thaw Cycle: The repeated freeze-thaw cycle can cause water to seep into small cracks or gaps in the roof. When the water freezes, it expands, widening the cracks and potentially leading to leaks.

What to Watch Out For: After a snowfall, monitor the buildup of snow on your roof. If the snow accumulation is significant, consider using a roof rake to remove excess snow safely. Look for signs of ice dams, such as icicles forming along the roof’s edge or water stains on the ceiling. Additionally, check for any cracks or gaps in the roof that could allow water to seep in and freeze.

5. Hail Damage

Hailstorms can cause extensive damage to your roof, depending on the size and intensity of the hailstones. Even small hailstones can damage roofing materials, leading to issues that may not be immediately apparent.

  • Shingle Bruising: Hail can bruise shingles, causing the protective granules to become dislodged. This exposes the asphalt layer of the shingle, making it more susceptible to UV damage and reducing its lifespan.
  • Cracks and Dents: Larger hailstones can crack or dent roofing materials, including shingles, tiles, and metal panels. These dents and cracks can compromise the roof’s ability to protect your home from the elements.
  • Leaks: Hail damage can lead to leaks if the roofing material is punctured or if the protective layer is compromised. Over time, these leaks can cause significant water damage to the interior of your home.

What to Watch Out For: After a hailstorm, inspect your roof for signs of damage, such as dents, cracks, or missing granules on the shingles. Even if the damage appears minor, it’s important to have a professional roofer assess the extent of the damage and determine if repairs are needed.

6. Temperature Fluctuations

Extreme temperature fluctuations, especially in regions with hot summers and cold winters, can have a significant impact on your roof. The constant expansion and contraction of roofing materials can lead to wear and tear over time.

  • Cracking and Splitting: Roofing materials, particularly asphalt shingles, can become brittle in cold weather and may crack or split when temperatures fluctuate. This weakens the roof’s ability to protect your home and can lead to leaks.
  • Thermal Shock: Thermal shock occurs when there is a sudden change in temperature, causing roofing materials to expand or contract rapidly. This can lead to the development of cracks or the loosening of roofing materials.
  • Condensation: In colder months, warm air from the inside of your home can rise into the attic and condense on the underside of the roof. This can lead to moisture buildup, which can damage the roofing structure and insulation.

What to Watch Out For: Regularly inspect your roof for signs of cracking, splitting, or loosening of roofing materials. Ensure that your attic is properly ventilated to prevent condensation and moisture buildup. If you live in an area with extreme temperature fluctuations, consider using roofing materials that are designed to withstand such conditions.

Conclusion

Weather is one of the most significant factors affecting the lifespan and integrity of your roof. By understanding how different weather conditions impact your roof and regularly inspecting it for signs of damage, you can take proactive steps to maintain and protect your home. Whether it’s the sun’s UV rays, heavy rain, strong winds, or the weight of snow and ice, each weather condition presents its own set of challenges. Regular maintenance, timely repairs, and professional inspections are key to ensuring that your roof remains in good condition and continues to protect your home for years to come.

How to Find the Best Real Estate Deals in Your Area

0

Finding the best real estate deals in your area requires a combination of research, strategy, and networking. Whether you’re a first-time homebuyer, an investor looking for profitable opportunities, or simply seeking a great deal on a property, understanding how to navigate the real estate market is crucial. With the right approach, you can uncover hidden gems and secure properties at prices below market value. Here’s a comprehensive guide on how to find the best real estate deals in your area.

1. Understand the Local Market

The first step in finding the best real estate deals is to understand the local market. Real estate markets can vary significantly from one area to another, so it’s important to familiarize yourself with the trends and conditions in your specific location.

  • Research Property Values: Start by researching property values in your area. Look at recent sales data to get an idea of what homes are selling for. Websites like Zillow, Redfin, and Realtor.com provide valuable insights into property prices, neighborhood trends, and market conditions.
  • Monitor Market Trends: Keep an eye on market trends, such as the average days on market, price reductions, and inventory levels. A market with high inventory and longer days on market may indicate a buyer’s market, where sellers are more motivated to negotiate.
  • Identify Growth Areas: Look for areas that are experiencing growth or revitalization. Neighborhoods with new developments, infrastructure improvements, and rising property values often present good investment opportunities.

2. Leverage Real Estate Agents

Working with a knowledgeable real estate agent can be invaluable in finding the best deals. Real estate agents have access to the Multiple Listing Service (MLS), which provides up-to-date information on available properties. They can also offer insights into local market conditions and help you identify properties that meet your criteria.

  • Choose the Right Agent: Select an agent who specializes in the type of property you’re interested in, whether it’s residential, commercial, or investment properties. A good agent will have a deep understanding of the local market and can help you identify properties that are priced below market value.
  • Communicate Your Goals: Be clear about your goals and budget with your agent. Whether you’re looking for a fixer-upper, a rental property, or a home to live in, your agent can tailor their search to find properties that align with your needs.
  • Ask About Off-Market Deals: Some of the best real estate deals are found off-market, meaning they are not listed on public platforms. These properties may be available through an agent’s network or from sellers who are looking to make a quick sale without listing the property publicly.

3. Use Online Real Estate Platforms

Online real estate platforms have revolutionized the way people search for properties. These platforms offer a wealth of information and tools that can help you find the best deals in your area.

  • Set Up Alerts: Most real estate websites allow you to set up alerts for new listings that match your criteria. This way, you can be notified as soon as a property that fits your needs becomes available.
  • Filter for Price Reductions: Use filters to search for properties that have had recent price reductions. Sellers who have lowered their asking price may be more willing to negotiate further, presenting an opportunity for you to get a great deal.
  • Explore Foreclosures and Short Sales: Many online platforms list foreclosures and short sales, which can offer significant discounts compared to traditional listings. However, these properties often require more due diligence, as they may come with legal or financial complications.

4. Network with Local Investors

Networking with local real estate investors can be a powerful way to find great deals. Investors often have access to off-market properties, distressed sales, and other opportunities that are not widely advertised.

  • Join Real Estate Investment Groups: Many cities have real estate investment groups or clubs where investors meet to share information and opportunities. Joining these groups can give you access to a network of experienced investors and potential deals.
  • Attend Local Auctions: Property auctions, including foreclosure and tax lien auctions, can be a source of great deals. Networking with other attendees at these auctions can also lead to valuable connections and insights.
  • Connect with Wholesalers: Real estate wholesalers specialize in finding deeply discounted properties and selling them to investors. Building a relationship with a wholesaler can give you access to properties before they hit the open market.

5. Drive Around Target Neighborhoods

Sometimes, the best deals are found by simply driving around neighborhoods of interest. This hands-on approach allows you to identify properties that may not be listed online or are in need of attention.

  • Look for Distressed Properties: Distressed properties, such as those with overgrown lawns, boarded-up windows, or signs of neglect, may indicate that the owner is willing to sell at a discount. You can contact the owner directly to inquire about purchasing the property.
  • Check for “For Sale By Owner” Signs: Properties sold directly by the owner (FSBO) are often not listed on traditional real estate platforms. These sellers may be more willing to negotiate, as they are not paying a commission to a real estate agent.
  • Explore New Developments: Driving through areas with new developments or planned communities can help you spot emerging opportunities. Developers may offer discounts on pre-construction homes or incentives to early buyers.

6. Consider Fixer-Uppers

Fixer-upper properties can offer significant savings if you’re willing to invest time and money into renovations. These properties are often priced below market value due to their condition, but they have the potential to yield a high return on investment.

  • Assess the Scope of Work: Before purchasing a fixer-upper, it’s important to assess the scope of work required. Get a professional inspection to identify any major issues, such as structural damage, plumbing, or electrical problems. Calculate the cost of repairs and renovations to determine if the property is a good deal.
  • Estimate the After-Repair Value (ARV): The ARV is the estimated value of the property after all repairs and renovations are completed. This figure is crucial for determining whether the investment is worthwhile. Compare the ARV to the purchase price and renovation costs to ensure a profitable margin.
  • Explore Financing Options: Financing a fixer-upper can be different from financing a move-in ready home. Look into options such as renovation loans, which provide funds for both the purchase and the renovation of the property.

7. Negotiate Effectively

Negotiation is a key skill in securing the best real estate deals. Whether you’re dealing with a traditional seller, a bank, or a distressed property owner, being prepared to negotiate can help you get the best price.

  • Know the Market Value: Before making an offer, research the market value of similar properties in the area. This knowledge gives you a strong position in negotiations and helps you justify your offer.
  • Be Ready to Walk Away: Sometimes, the best negotiation tactic is being willing to walk away. If a seller knows you’re not desperate to buy, they may be more inclined to accept your offer or negotiate further.
  • Consider Contingencies: Including contingencies in your offer, such as financing, inspection, or appraisal contingencies, can protect you during the negotiation process. These contingencies allow you to back out of the deal if certain conditions are not met, giving you more leverage in negotiations.

8. Take Advantage of Seasonal Trends

The real estate market is influenced by seasonal trends, and timing your search can help you find better deals.

  • Buy in the Off-Season: The real estate market tends to slow down during the winter months, which can be an ideal time to find deals. Fewer buyers in the market mean less competition, and sellers may be more motivated to negotiate.
  • Look for End-of-Year Discounts: Toward the end of the year, sellers who want to close a deal before the new year may offer discounts or incentives. This is particularly true for new construction homes, where builders may want to clear inventory.

9. Be Patient and Persistent

Finding the best real estate deals takes time and persistence. It’s important to be patient and not rush into a purchase just because you’re eager to buy. The more time you spend researching, networking, and exploring different options, the more likely you are to find a great deal.

  • Stay Active in Your Search: Continuously monitor the market, attend open houses, and stay in touch with your real estate agent. The best deals often come to those who are actively looking and ready to act quickly.
  • Reevaluate Your Criteria: If you’re having trouble finding a property that meets all your criteria, consider reevaluating your priorities. Being flexible on factors like location, property size, or condition can open up new opportunities.

Conclusion

Finding the best real estate deals in your area requires a combination of market knowledge, networking, and strategic thinking. By understanding the local market, leveraging the expertise of real estate agents, utilizing online platforms, and being prepared to negotiate, you can uncover hidden opportunities and secure properties at favorable prices. Whether you’re looking for a home to live in or an investment property, following these steps will help you find the best deals and make informed decisions in the real estate market.

Essential Garden Services for New Homeowners

0

Moving into a new home is an exciting experience, but it also comes with the responsibility of maintaining and enhancing your property. For many new homeowners, the garden is a key feature of their home, offering a space for relaxation, outdoor activities, and adding curb appeal. However, maintaining a garden requires regular care and attention, and it can be overwhelming if you’re unfamiliar with gardening tasks. To help you get started, here’s a guide to essential garden services that every new homeowner should consider.

1. Lawn Care and Maintenance

A well-maintained lawn is the cornerstone of a beautiful garden. Regular lawn care not only enhances the appearance of your home but also ensures that your grass remains healthy and resilient. Lawn care services typically include mowing, edging, fertilizing, aerating, and overseeding.

  • Mowing: Regular mowing keeps your lawn looking neat and prevents overgrowth, which can lead to weed infestation and disease. The ideal mowing height varies depending on the type of grass, but most lawns should be mowed to a height of about 2.5 to 3 inches.
  • Edging: Edging along driveways, walkways, and garden beds gives your lawn a clean, defined look. It also prevents grass from encroaching on these areas.
  • Fertilizing: Fertilization provides essential nutrients that your lawn needs to thrive. A balanced fertilizer should be applied several times a year, depending on the type of grass and soil conditions.
  • Aerating: Aeration involves perforating the soil with small holes to allow air, water, and nutrients to penetrate the grassroots. This helps alleviate soil compaction and promotes healthy root growth.
  • Overseeding: Overseeding is the process of spreading new grass seed over an existing lawn to fill in bare spots and improve lawn density. This is typically done in the fall or spring when conditions are ideal for seed germination.

2. Garden Bed Preparation and Planting

Whether you’re starting a new garden or revamping an existing one, proper garden bed preparation is crucial for the success of your plants. Garden bed preparation services include soil testing, tilling, composting, and planting.

  • Soil Testing: Soil testing determines the pH level and nutrient content of your soil, which is essential for selecting the right plants and fertilizers. Based on the test results, you can amend the soil to create the ideal growing conditions for your garden.
  • Tilling: Tilling involves turning over the soil to break up compacted layers and incorporate organic matter. This improves soil structure and drainage, making it easier for plant roots to grow.
  • Composting: Adding compost to your garden beds enriches the soil with organic matter, which improves soil fertility and water retention. Composting also promotes beneficial microbial activity in the soil.
  • Planting: Once the garden beds are prepared, it’s time to plant your flowers, shrubs, and vegetables. Garden services can help you select the right plants for your climate and soil conditions, ensuring that your garden thrives throughout the year.

3. Tree and Shrub Care

Trees and shrubs are essential components of your garden, providing structure, shade, and beauty. However, they require regular care to stay healthy and attractive. Tree and shrub care services include pruning, trimming, fertilizing, and pest control.

  • Pruning and Trimming: Pruning involves removing dead, diseased, or overgrown branches to promote healthy growth and improve the appearance of trees and shrubs. Trimming is also important for maintaining the shape and size of your plants.
  • Fertilizing: Just like your lawn, trees and shrubs need nutrients to thrive. Fertilizing provides the essential elements required for strong root development and vibrant foliage.
  • Pest Control: Trees and shrubs are susceptible to various pests and diseases that can cause significant damage if left untreated. Garden services can diagnose and treat pest infestations and diseases, using environmentally friendly methods whenever possible.

4. Irrigation System Installation and Maintenance

Watering your garden efficiently is key to keeping your plants healthy while conserving water. An irrigation system ensures that your garden receives the right amount of water at the right time, without the need for manual watering.

  • Irrigation System Installation: Garden services can design and install an irrigation system tailored to your garden’s specific needs. This may include drip irrigation for garden beds, sprinklers for lawns, and soaker hoses for trees and shrubs.
  • Irrigation System Maintenance: Regular maintenance of your irrigation system is essential to ensure it operates efficiently. This includes checking for leaks, adjusting sprinkler heads, and winterizing the system to prevent damage during cold weather.

5. Mulching

Mulching is a vital garden service that helps retain soil moisture, suppress weeds, and improve soil fertility. It involves applying a layer of organic or inorganic material over the soil surface around plants.

  • Organic Mulch: Organic mulch, such as wood chips, straw, or compost, breaks down over time, adding nutrients to the soil. It also helps regulate soil temperature and protect plant roots from extreme weather conditions.
  • Inorganic Mulch: Inorganic mulch, such as gravel or landscape fabric, doesn’t decompose but provides long-lasting weed control and a clean, finished look for your garden beds.

6. Weed Control

Weeds are a common challenge for gardeners, as they compete with your plants for water, nutrients, and sunlight. Effective weed control is essential for maintaining a healthy and attractive garden.

  • Manual Weed Removal: Hand-pulling weeds is an effective way to remove them from your garden, especially in small areas or around delicate plants. Garden services can also use tools like hoes or weeders to remove weeds from larger areas.
  • Herbicides: For more extensive weed problems, herbicides may be necessary. Garden services can apply pre-emergent herbicides to prevent weed seeds from germinating or post-emergent herbicides to kill existing weeds. It’s important to use herbicides carefully to avoid damaging your plants and the environment.

7. Seasonal Clean-Up

Seasonal clean-up is an essential garden service that keeps your garden looking its best throughout the year. This includes removing dead plants, leaves, and debris, as well as preparing your garden for the changing seasons.

  • Spring Clean-Up: Spring is the time to remove any debris that accumulated over the winter, prune dead branches, and prepare your garden beds for planting. It’s also a good time to apply a fresh layer of mulch and check your irrigation system for any damage.
  • Fall Clean-Up: In the fall, garden services can help you prepare your garden for winter by removing dead plants, cleaning up fallen leaves, and protecting delicate plants from frost. This may also include pruning trees and shrubs, aerating the lawn, and winterizing your irrigation system.

8. Landscape Design and Installation

If you’re looking to transform your garden into a beautiful outdoor space, landscape design and installation services are essential. A professional landscape designer can help you create a garden that reflects your style and complements your home’s architecture.

  • Landscape Design: Landscape design involves planning the layout and features of your garden, including plant selection, hardscaping, and lighting. A well-designed landscape enhances the beauty of your home and increases its value.
  • Landscape Installation: Once the design is finalized, garden services can install the plants, hardscaping elements, and lighting according to the plan. This may include installing patios, walkways, retaining walls, water features, and outdoor lighting.

9. Pest and Disease Management

Pests and diseases can wreak havoc on your garden if not managed properly. Pest and disease management services help protect your plants from damage and ensure that your garden remains healthy and vibrant.

  • Integrated Pest Management (IPM): IPM is an environmentally friendly approach to pest control that involves monitoring pest populations, using natural predators, and applying targeted treatments only when necessary. This approach minimizes the use of chemicals and promotes a healthy garden ecosystem.
  • Disease Prevention and Treatment: Garden services can diagnose and treat plant diseases using organic or chemical treatments. Preventive measures, such as proper watering, spacing, and pruning, can also help reduce the risk of disease in your garden.

10. Soil Testing and Amendment

Healthy soil is the foundation of a thriving garden. Soil testing and amendment services help you understand the condition of your soil and make necessary adjustments to improve its fertility and structure.

  • Soil Testing: Soil testing analyzes the pH, nutrient content, and texture of your soil. Based on the results, garden services can recommend the appropriate amendments, such as lime, sulfur, or organic matter, to improve soil health.
  • Soil Amendment: Adding organic matter, such as compost or manure, improves soil fertility, structure, and water retention. Other amendments, such as gypsum or sand, can help improve soil drainage in heavy clay soils.

Conclusion

As a new homeowner, taking care of your garden is essential for maintaining the beauty and value of your property. By investing in essential garden services like lawn care, tree and shrub maintenance, irrigation, and landscape design, you can create a thriving outdoor space that enhances your home and provides a place for relaxation and enjoyment. Whether you choose to hire professionals or tackle some of these tasks yourself, having a well-maintained garden will bring you years of satisfaction and enjoyment.

Essential Tools Every Homeowner Should Have for Basic Plumbing Repairs

0

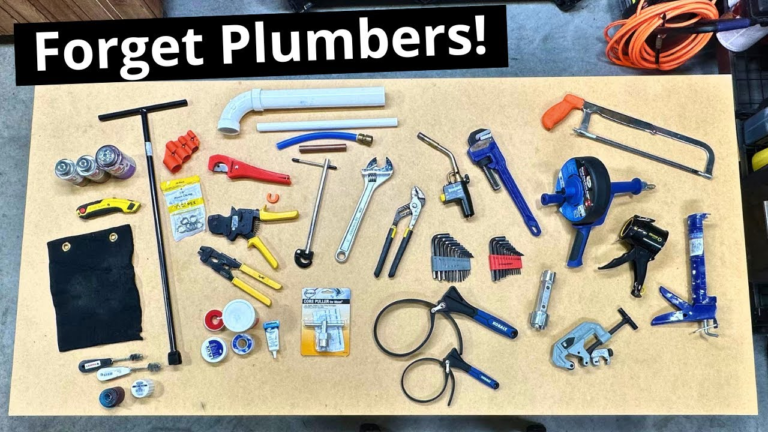
Plumbing issues are an inevitable part of homeownership, and while some problems require professional attention, many basic plumbing repairs can be handled with the right tools and a bit of know-how. Having a well-stocked toolkit allows you to tackle minor leaks, clogs, and other common plumbing problems without the need to call a plumber. Not only can this save you money, but it also ensures that you can address emergencies quickly before they escalate into bigger issues. Here’s a guide to the essential tools every homeowner should have for basic plumbing repairs.

1. Plunger

A plunger is one of the most fundamental plumbing tools and a must-have for every homeowner. It’s the first line of defense against clogs in toilets, sinks, and drains. Plungers come in different types, but the most common ones are the cup plunger and the flange plunger. The cup plunger, with its flat rubber cup, is ideal for unclogging sinks and bathtubs, while the flange plunger, which has an extended rubber lip, is specifically designed for toilets. When using a plunger, ensure a tight seal over the drain and use firm, controlled pushes to dislodge the clog.

2. Adjustable Wrench

An adjustable wrench is a versatile tool that is essential for tightening or loosening nuts and bolts on plumbing fixtures. Its adjustable jaw allows it to fit various sizes of fasteners, making it useful for a wide range of plumbing tasks. For plumbing repairs, it’s particularly handy for working on faucets, showerheads, and compression fittings. When selecting an adjustable wrench, opt for one with a comfortable grip and a smooth adjustment mechanism to make your work easier and more efficient.

3. Pipe Wrench

While an adjustable wrench is great for smaller fittings, a pipe wrench is essential for working on larger pipes and fittings. The pipe wrench’s serrated jaws provide a strong grip on pipes, allowing you to tighten or loosen them without slipping. Pipe wrenches come in various sizes, so having a couple of different sizes in your toolkit can be helpful. They are particularly useful for tasks such as replacing old pipes, installing new plumbing lines, or working on pipe joints. Be cautious when using a pipe wrench on delicate fixtures, as the serrated jaws can leave marks or damage the surface.

4. Plumber’s Tape (Teflon Tape)

Plumber’s tape, also known as Teflon tape, is a thin, white tape that is used to seal pipe threads and prevent leaks. It’s a simple yet essential tool for any plumbing repair that involves threaded connections, such as installing showerheads, faucets, or water supply lines. To use plumber’s tape, wrap it clockwise around the male threads of the pipe or fitting three to four times before screwing the components together. This helps create a watertight seal and prevents leaks from occurring.

5. Basin Wrench

A basin wrench is a specialized tool designed for working in tight spaces, particularly under sinks. Its long, T-shaped handle and pivoting jaw make it ideal for reaching and turning nuts that are located in hard-to-access areas, such as behind sinks where faucets are mounted. The basin wrench’s unique design allows you to grip and turn nuts with ease, even in cramped spaces where other wrenches would be difficult to use. This tool is indispensable for tasks like replacing a faucet or tightening loose connections under the sink.

6. Plumber’s Snake (Drain Auger)

A plumber’s snake, or drain auger, is a flexible, coiled tool used to clear stubborn clogs that a plunger can’t handle. It’s particularly useful for clearing blockages in sinks, toilets, and drains. The plumber’s snake is inserted into the drain and rotated to break up or retrieve the clog. There are different types of plumber’s snakes, including hand-crank models and motorized versions. For most homeowners, a manual hand-crank drain auger is sufficient for basic plumbing repairs. This tool is essential for maintaining clear drains and preventing more serious plumbing issues down the line.

7. Plumber’s Putty

Plumber’s putty is a soft, moldable compound used to create watertight seals around plumbing fixtures, such as faucets, drains, and sink strainers. Unlike silicone sealant, plumber’s putty remains pliable, making it easy to apply and remove if needed. It’s particularly useful for sealing around fixtures that need to be installed or removed frequently. To use plumber’s putty, roll it into a thin rope and press it around the edge of the fixture before installing it. The putty will create a seal that prevents water from leaking through the gaps.

8. Hacksaw

A hacksaw is a versatile cutting tool that can be used to cut through metal, plastic, and even some types of wood. In plumbing repairs, a hacksaw is often used to cut pipes, bolts, and other metal components. It’s particularly useful when replacing old, corroded pipes or cutting new pipes to fit specific measurements. When using a hacksaw, ensure that the blade is sharp and securely fastened, and use steady, even strokes to make clean cuts. For cutting through thicker pipes, you may need to use a pipe cutter instead of a hacksaw.

9. Pipe Cutter

A pipe cutter is a specialized tool designed for cutting metal or plastic pipes cleanly and precisely. Unlike a hacksaw, which can leave rough edges, a pipe cutter produces smooth, even cuts that are ready for fitting. Pipe cutters come in different sizes to accommodate various pipe diameters, and they are particularly useful for cutting copper, PVC, and PEX pipes. To use a pipe cutter, place the tool around the pipe, tighten the cutting wheel against the pipe, and rotate the tool around the pipe until it cuts through. This tool is essential for any plumbing repair that involves cutting and fitting new pipes.

10. Plunger

Another essential tool in your plumbing arsenal is a plumber’s helper, commonly known as a plunger. A plunger is used to dislodge clogs in toilets, sinks, and drains by creating a vacuum that forces water through the pipe to clear the blockage. There are different types of plungers, including the cup plunger, which is ideal for sinks and bathtubs, and the flange plunger, which is specifically designed for toilets. When using a plunger, make sure to create a tight seal over the drain and apply firm, even pressure to clear the clog.

11. Adjustable Pliers

Adjustable pliers, also known as slip-joint or channel-lock pliers, are versatile tools that can be used for gripping, twisting, and turning pipes, fittings, and other plumbing components. Their adjustable jaws allow them to accommodate different sizes of fasteners, making them useful for a variety of tasks, such as tightening or loosening nuts and bolts, gripping pipes, or holding components in place. Adjustable pliers are particularly handy for tasks that require a strong grip or leverage, such as removing stubborn nuts or adjusting plumbing fixtures.

12. Tubing Cutter

A tubing cutter is a specialized tool designed for cutting through metal pipes and tubing, such as copper or steel. Unlike a hacksaw, which can leave rough edges, a tubing cutter makes clean, smooth cuts that are ready for soldering or fitting. Tubing cutters come in different sizes to accommodate various pipe diameters, and they are particularly useful for cutting pipes to length or making precise cuts in tight spaces. To use a tubing cutter, place the tool around the pipe, tighten the cutting wheel against the pipe, and rotate the tool around the pipe until it cuts through.

13. Caulking Gun

A caulking gun is a tool used to apply caulk, sealant, or adhesive to create watertight seals around plumbing fixtures, such as sinks, bathtubs, and showers. Caulking is essential for preventing water leaks and sealing gaps that can allow moisture to seep into walls, floors, or other areas. A caulking gun allows you to apply caulk precisely and evenly, ensuring a smooth, professional finish. When using a caulking gun, make sure to cut the tip of the caulk tube at a 45-degree angle to control the flow of caulk and apply it smoothly.

14. Plumber’s Torch

A plumber’s torch is a tool used for soldering copper pipes and fittings, creating strong, leak-proof connections. Soldering is a process that involves heating the pipe and fitting with the torch and then applying solder to create a bond. This tool is essential for any plumbing repair that involves working with copper pipes, such as installing new plumbing lines or repairing leaks. When using a plumber’s torch, make sure to work in a well-ventilated area and use proper safety precautions to avoid burns or other injuries.

15. Safety Gear

Safety gear is an essential part of any plumbing toolkit, as it helps protect you from potential hazards while working on plumbing repairs. This includes gloves to protect your hands from cuts, abrasions, and chemical exposure, safety goggles to protect your eyes from debris and splashes, and a dust mask to protect your lungs from dust and fumes. Depending on the type of plumbing work you’re doing, you may also need additional safety gear, such as ear protection, knee pads, or a hard hat.

Conclusion

Having the right tools is essential for any homeowner looking to handle basic plumbing repairs. With the tools listed above, you’ll be well-equipped to tackle common plumbing issues, from unclogging drains to repairing leaks and replacing fixtures. Investing in a good set of plumbing tools not only saves you money on professional services but also gives you the confidence to address plumbing emergencies quickly and effectively.

Why Deep Cleaning Is Essential Before Moving Into a New Home

0

Moving into a new home is an exciting milestone, but before you start unpacking boxes and arranging furniture, there’s an important task that should be at the top of your to-do list: deep cleaning. While the previous occupants may have left the home in what appears to be a clean condition, there’s often more dirt, dust, and grime lurking beneath the surface. Deep cleaning your new home before moving in ensures a fresh start, a healthier living environment, and peace of mind. Here’s why deep cleaning is essential before settling into your new space.

1. Remove Hidden Dirt and Allergens

Even if a home looks clean, it’s likely that dirt, dust, and allergens have accumulated over time, especially in less accessible areas. Carpets, for example, can harbor dust mites, pet dander, and other allergens that are not easily removed with a standard vacuuming. Deep cleaning involves thorough vacuuming with a high-efficiency particulate air (HEPA) filter vacuum, as well as professional carpet cleaning to extract embedded dirt and allergens.

In addition to carpets, other areas that can trap dirt and allergens include air vents, baseboards, and behind large appliances. Dust and grime in these areas can affect the air quality in your home, potentially triggering allergies or respiratory issues. A deep clean addresses these hidden areas, creating a healthier environment for you and your family.

2. Ensure a Fresh Start

Moving into a new home marks the beginning of a new chapter in your life, and deep cleaning helps to ensure that you’re starting fresh. By removing any remnants of the previous occupants, such as stains, odors, and grime, you can make the space truly your own. This is especially important if the home was previously occupied by pets or smokers, as lingering odors can be difficult to eliminate without a thorough cleaning.

Deep cleaning also provides an opportunity to assess the condition of the home’s surfaces, fixtures, and appliances. By starting with a clean slate, you can more easily identify any areas that need repairs or maintenance, ensuring that your new home is not only clean but also in good working order.

3. Eliminate Bacteria and Germs

While surfaces may appear clean, they can still harbor harmful bacteria and germs, especially in high-touch areas like door handles, light switches, and bathroom fixtures. Deep cleaning involves the use of disinfectants and sanitizers to eliminate these pathogens, reducing the risk of illness for you and your family.

Kitchens and bathrooms are particularly important areas to focus on, as they are prone to accumulating germs. In the kitchen, deep cleaning should include disinfecting countertops, cabinets, and appliances, as well as thoroughly cleaning the inside of the refrigerator and oven. In the bathroom, it’s essential to disinfect sinks, toilets, showers, and bathtubs, and to replace any moldy caulking or grout.

4. Protect Your Investment

Your new home is likely one of the biggest investments you’ll ever make, and deep cleaning is a crucial step in protecting that investment. Dirt, grime, and neglect can lead to long-term damage to surfaces and fixtures, reducing the value of your home. For example, built-up grease and grime in the kitchen can cause permanent staining or damage to countertops and cabinets, while neglected bathrooms can develop mold and mildew that can spread to other areas of the home.

By deep cleaning before you move in, you can address any existing issues and prevent future problems from developing. Regular deep cleaning also helps to maintain the appearance and condition of your home, preserving its value over time.

5. Create a Safe Environment for Children and Pets

If you have young children or pets, deep cleaning is especially important to ensure their safety and well-being. Children often play on the floor and put objects in their mouths, making them more susceptible to exposure to dirt, allergens, and harmful chemicals. Similarly, pets can be affected by residual odors or chemicals left behind by previous occupants.

Deep cleaning helps to remove these potential hazards, creating a safer environment for your loved ones. This includes cleaning and disinfecting floors, baseboards, and other surfaces that children and pets are likely to come into contact with. Additionally, using pet-safe and child-friendly cleaning products ensures that your home is safe for everyone.

6. Prepare the Home for New Furniture and Belongings

Before you move your furniture and belongings into your new home, it’s essential to deep clean the space to prevent dirt and dust from transferring to your items. For example, placing a clean couch on a dirty floor can result in dust and allergens becoming embedded in the upholstery. Deep cleaning ensures that your belongings remain clean and free from contaminants as you set up your new home.

Additionally, deep cleaning allows you to organize your space more effectively. With a clean and clutter-free environment, you can more easily plan the layout of your furniture and belongings, ensuring that everything has its place from the start.

7. Enhance the Longevity of Your Appliances

If your new home comes with appliances, such as a refrigerator, oven, dishwasher, or washing machine, it’s important to deep clean them before use. Over time, appliances can accumulate grease, food residue, and other debris that can affect their performance and lifespan. Deep cleaning removes this buildup, allowing your appliances to function more efficiently and reducing the risk of breakdowns.

For example, cleaning the coils on the back of the refrigerator can improve its cooling efficiency and prevent overheating, while cleaning the filters and seals on the dishwasher and washing machine can prevent leaks and odors. By taking the time to deep clean your appliances, you can extend their life and avoid costly repairs or replacements.

8. Address Pest Control Issues

Even if a home appears clean, it may still harbor pests such as ants, roaches, or rodents, especially if the previous occupants did not maintain the property properly. Deep cleaning allows you to identify and address any potential pest control issues before they become a problem. This includes cleaning out cupboards, pantries, and closets where pests are likely to hide, as well as inspecting for signs of infestation, such as droppings or gnawed materials.

If you discover evidence of pests during the deep cleaning process, it’s important to take immediate action to eliminate them. This may involve sealing cracks and gaps, removing food sources, and using pest control products or hiring a professional exterminator. Addressing pest issues before you move in ensures that your new home remains a clean and comfortable place to live.

9. Improve Energy Efficiency

Deep cleaning can also contribute to improved energy efficiency in your new home. Dust and dirt buildup in areas such as air vents, ducts, and filters can restrict airflow and force your HVAC system to work harder, leading to higher energy bills. By cleaning these areas thoroughly, you can improve the efficiency of your heating and cooling systems, reducing energy consumption and saving money in the long run.

In addition to cleaning air vents and filters, consider checking the condition of windows and doors during the deep cleaning process. Sealing any gaps or leaks can help prevent drafts and improve insulation, further enhancing your home’s energy efficiency.

10. Personalize Your Space

Deep cleaning gives you the opportunity to personalize your new home to your liking. As you clean, you can decide on any additional changes or upgrades you’d like to make, such as repainting walls, replacing fixtures, or adding decorative touches. Starting with a clean space makes it easier to visualize and implement your design ideas, allowing you to create a home that reflects your style and preferences.

Personalizing your space also includes setting up your organization systems from the start. Whether it’s installing shelving, adding storage solutions, or arranging your kitchen cabinets, deep cleaning allows you to take inventory of what you have and determine the best way to organize your belongings.

11. Peace of Mind

Finally, deep cleaning your new home before moving in provides peace of mind. Knowing that every corner of your home has been thoroughly cleaned and sanitized allows you to settle in with confidence, knowing that you and your family are living in a safe and healthy environment. It also eliminates any lingering concerns about the condition in which the previous occupants left the home.

Moving can be a stressful process, but taking the time to deep clean before you unpack can alleviate some of that stress and make the transition smoother. It sets the tone for your new life in your new home, allowing you to focus on enjoying your space and making it your own.

Conclusion

Deep cleaning is an essential step before moving into a new home, offering numerous benefits that contribute to a healthier, safer, and more comfortable living environment. By removing hidden dirt, allergens, and bacteria, protecting your investment, and preparing your space for new furniture and belongings, deep cleaning ensures that you start your new chapter on the right foot. Whether you choose to do it yourself or hire professionals, deep cleaning is a worthwhile investment that pays off in the long run, giving you the peace of mind you need to fully enjoy your new home.

How to Safeguard Your Home While on Vacation

0

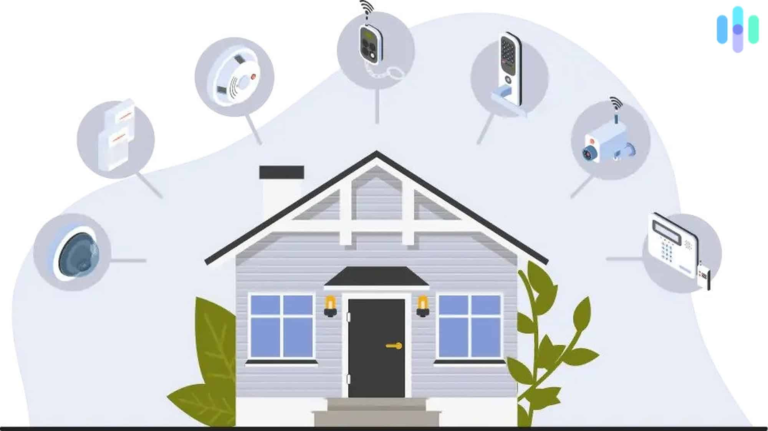
Going on vacation is a time to relax and unwind, but the last thing you want to worry about while you’re away is the safety of your home. Ensuring that your property is secure can give you peace of mind and allow you to fully enjoy your time off. Whether you’re heading out for a weekend getaway or an extended trip, taking the necessary precautions to safeguard your home is essential. This guide provides practical tips and strategies to protect your home from potential threats while you’re on vacation.

1. Install a Home Security System

One of the most effective ways to protect your home is by installing a home security system. Modern security systems offer a wide range of features, including motion detectors, surveillance cameras, door and window sensors, and alarms. Many systems are also equipped with smart technology, allowing you to monitor and control your home remotely through your smartphone. If an intruder attempts to break in, the system will alert you and the authorities immediately, reducing the risk of theft or damage.

When choosing a security system, consider options that include 24/7 monitoring services, which provide constant surveillance and quick response times in case of an emergency. Additionally, visible security cameras and signs indicating that your home is protected by a security system can act as deterrents to potential burglars.

2. Use Smart Lighting to Create the Illusion of Presence

A dark, unoccupied home is an easy target for burglars. To create the illusion that someone is home, use smart lighting to control your lights remotely or set them on a timer. You can schedule lights to turn on and off at different times of the day, mimicking your usual routine. Smart bulbs can be controlled via an app on your phone, allowing you to adjust the lighting even if your plans change while you’re away.

In addition to interior lights, consider using smart outdoor lighting. Motion-activated lights can startle potential intruders and draw attention to any suspicious activity. Placing lights near entry points such as doors and windows is particularly effective in deterring break-ins.

3. Secure Doors and Windows

Before leaving for vacation, take the time to thoroughly check all doors and windows to ensure they are securely locked. This may seem obvious, but it’s easy to overlook a window or forget to lock a back door in the rush of preparing for a trip. If your locks are old or damaged, consider upgrading them to more secure options, such as deadbolts or smart locks.

Sliding glass doors are often a weak point in home security. To reinforce them, place a sturdy rod or dowel in the track to prevent the door from being forced open. Additionally, consider installing a security bar or door brace for added protection.

4. Notify Trusted Neighbors or Friends

Enlisting the help of a trusted neighbor or friend is an excellent way to keep an eye on your home while you’re away. Ask them to collect your mail, newspapers, and packages to prevent them from piling up, which can signal to burglars that the house is unoccupied. If possible, have them park their car in your driveway occasionally to create the appearance that someone is home.

Provide your neighbor or friend with a spare key in case of emergencies, but avoid leaving spare keys in obvious hiding places like under the doormat or in a flowerpot. Also, ask them to check on your home periodically, especially after any severe weather, to ensure everything is in order.

5. Hold Your Mail and Deliveries

If you don’t have someone to collect your mail and packages, consider placing a hold on them while you’re away. The U.S. Postal Service offers a mail-holding service that can be set up online or at your local post office. This service temporarily stops mail delivery to your address, preventing an overflowing mailbox that could attract unwanted attention.

For deliveries from other carriers, you can either schedule them to arrive before or after your vacation or arrange to pick them up at a local facility. Many online retailers also offer options to delay shipments or hold packages for pick-up, giving you flexibility in managing your deliveries.

6. Keep Your Plans Off Social Media

While it’s tempting to share your vacation plans on social media, doing so can inadvertently alert potential burglars that your home will be unoccupied. Even if your privacy settings are set to friends-only, it’s best to avoid posting details about your trip until after you’ve returned home. Instead, share your photos and experiences after the fact to reduce the risk of someone targeting your home while you’re away.

If you have children or teenagers, remind them not to post about the family’s travel plans on social media. Burglars often monitor social media platforms for this type of information, so it’s essential to be cautious about what is shared online.

7. Maintain Your Home’s Appearance

An unkempt yard or a driveway covered in snow can signal to burglars that no one is home. Before you leave, make arrangements for someone to maintain your yard, especially if you’ll be away for an extended period. This includes mowing the lawn, trimming hedges, and watering plants. If you’re traveling during the winter, hire a service to clear snow from your driveway and walkways.

Additionally, consider having your trash bins taken out and brought back on your regular garbage collection day. This simple act can help maintain the appearance that someone is home and going about their usual routine.

8. Unplug Electronics and Appliances

Unplugging electronics and appliances not only conserves energy but also reduces the risk of electrical fires while you’re away. Items such as televisions, computers, and small kitchen appliances can be unplugged to prevent power surges or short circuits. For added safety, you can also turn off the main water valve to prevent potential leaks or flooding from occurring while you’re gone.

If you have an automatic sprinkler system, make sure it is set correctly to water your lawn as needed without causing any issues. Check for any leaks or malfunctions before you leave to ensure everything runs smoothly in your absence.

9. Install Window and Door Alarms

Window and door alarms are an additional layer of security that can help protect your home. These alarms are designed to alert you if a window or door is opened while the system is armed. Many modern alarms are wireless and can be easily installed without the need for professional assistance. They can also be integrated with your home security system or controlled via a smartphone app.

For maximum effectiveness, place alarms on all accessible windows and doors, including those on the second floor. Burglars often target less obvious entry points, so securing all potential access points is crucial.

10. Use a Safe for Valuables

Even with the best security measures in place, it’s wise to take extra precautions with your most valuable items. Store important documents, jewelry, cash, and other valuables in a secure, fireproof safe. If you have a home security system, consider placing the safe in a less obvious location to make it harder for intruders to find.

Alternatively, you can store your valuables in a safety deposit box at your bank. This option offers additional security, especially for items that are irreplaceable or highly valuable.

11. Consider Hiring a House Sitter

If you’re planning an extended vacation, hiring a house sitter can be an excellent way to ensure your home is cared for while you’re away. A house sitter can perform daily tasks such as watering plants, feeding pets, and taking out the trash, all while maintaining the appearance that the home is occupied. This can be particularly beneficial if you’re concerned about potential break-ins or other issues that may arise during your absence.

When hiring a house sitter, choose someone you trust or go through a reputable service that thoroughly vets their sitters. Provide clear instructions on what needs to be done and how to contact you in case of an emergency.

12. Review Your Home Insurance Policy

Before heading out on vacation, it’s a good idea to review your home insurance policy to ensure you’re adequately covered in case of theft, vandalism, or other damage while you’re away. Some policies have specific requirements, such as maintaining a security system or having someone check on the property regularly, to remain valid. Understanding your coverage can help you take the necessary steps to protect your home and avoid any complications if you need to file a claim.

If your policy is outdated or doesn’t provide enough coverage, consider updating it or purchasing additional coverage for added peace of mind.

13. Set Up a Security Perimeter

For added protection, consider setting up a security perimeter around your home. This can include installing a fence with a locked gate, adding security cameras at key points around the property, and using motion detectors to monitor activity in your yard. A well-lit perimeter combined with visible security measures can be a strong deterrent to potential intruders.

If you have a larger property, consider using outdoor security cameras with wide-angle lenses or infrared capabilities to monitor all areas effectively. Many modern systems allow you to view live footage remotely, giving you the ability to check on your property from anywhere in the world.

14. Make Sure Your HVAC System is in Good Working Order

While it’s essential to focus on security, don’t overlook the importance of maintaining your home’s HVAC system while you’re away. Set your thermostat to a temperature that will prevent your home from becoming too hot or too cold, which can cause damage to your belongings or lead to issues like frozen pipes. If you have a smart thermostat, you can adjust the temperature remotely based on real-time weather conditions.

Before you leave, schedule a maintenance check for your HVAC system to ensure it’s functioning correctly. This can help prevent any unexpected breakdowns or issues while you’re on vacation.

In conclusion, safeguarding your home while on vacation requires careful planning and the implementation of various security measures. By following these tips, you can minimize the risk of break-ins, damage, and other issues, allowing you to enjoy your

A Guide to Maintaining Your Home’s Exterior Paint

0

Maintaining the exterior paint of your home is essential for preserving its aesthetic appeal, protecting it from the elements, and prolonging the life of your property. The exterior of your home is constantly exposed to harsh weather conditions, UV rays, dirt, and other factors that can cause the paint to fade, crack, or peel over time. Proper maintenance can keep your home looking fresh and vibrant while preventing costly repairs in the future. This guide will provide you with practical tips and steps to ensure your home’s exterior paint remains in top condition.

1. Understanding the Importance of Exterior Paint Maintenance

Exterior paint serves more than just a decorative purpose; it acts as a protective barrier for your home’s exterior surfaces. By maintaining the paint, you can prevent damage from moisture, UV rays, and temperature fluctuations, which can lead to issues like wood rot, mold growth, and structural damage. Regular maintenance not only enhances curb appeal but also helps maintain the value of your home.

2. Regularly Inspect Your Home’s Exterior

The first step in maintaining your home’s exterior paint is to conduct regular inspections. Ideally, you should inspect the exterior of your home at least twice a year, preferably in the spring and fall. Look for signs of paint damage, such as cracking, peeling, blistering, or fading. Pay close attention to areas that are more exposed to the elements, such as the roofline, corners, and south-facing walls. Identifying and addressing issues early can prevent more significant problems down the line.

3. Cleaning the Exterior Surfaces

Dirt, dust, mold, and mildew can accumulate on your home’s exterior, causing the paint to deteriorate over time. Regular cleaning is essential to maintain the appearance and longevity of the paint. Use a garden hose or a pressure washer on a low setting to rinse off loose dirt and debris. For more stubborn stains, you can use a soft brush and a mixture of water and mild detergent to scrub the surfaces gently. Be sure to rinse thoroughly to remove any soap residue. Cleaning should be done at least once a year, or more frequently if your home is in a particularly dusty or humid environment.

4. Addressing Mold and Mildew

Mold and mildew can develop on painted surfaces, especially in humid or shaded areas. These fungi not only mar the appearance of your home but can also weaken the paint and underlying materials. To remove mold and mildew, mix a solution of one part bleach to three parts water and apply it to the affected areas using a soft brush. Allow the solution to sit for about 15 minutes before rinsing thoroughly with water. Always wear protective gloves and eyewear when handling bleach, and test the solution on a small, inconspicuous area first to ensure it doesn’t damage the paint.

5. Repairing Minor Paint Damage

Even with regular maintenance, minor paint damage can occur. Small cracks, chips, or peeling paint should be repaired promptly to prevent moisture from seeping in and causing further damage. To repair these issues, start by sanding the damaged area lightly to remove loose paint. Then, apply a primer to the exposed surface to ensure good adhesion of the new paint. Once the primer is dry, apply a matching exterior paint using a brush or roller. Feather the edges of the new paint to blend it seamlessly with the surrounding area. For best results, choose high-quality, weather-resistant paint that matches the existing color.

6. Repainting as Needed

While regular maintenance can extend the life of your exterior paint, there will come a time when a full repaint is necessary. The frequency of repainting depends on various factors, including the quality of the original paint, the climate, and the amount of sun exposure your home receives. On average, homes need to be repainted every 5 to 10 years. Signs that it’s time for a repaint include widespread fading, cracking, or peeling, as well as significant color change due to UV exposure. When repainting, consider using paint with built-in UV protection and mildew resistance to enhance durability.

7. Protecting Vulnerable Areas

Certain areas of your home’s exterior are more vulnerable to damage and may require extra protection. For example, wooden trim, windowsills, and door frames are more prone to moisture damage and may need to be repainted more frequently than other areas. Consider applying a clear sealant or wood preservative to these areas after painting to provide an additional layer of protection against the elements. Similarly, metal surfaces such as gutters, downspouts, and railings can be susceptible to rust and corrosion. Use a rust-inhibiting primer and paint on these surfaces to prevent damage and extend the life of the paint.

8. Sealing Cracks and Gaps

Cracks and gaps in your home’s exterior can allow moisture to seep in, leading to paint damage and other issues such as wood rot or mold growth. It’s essential to seal these openings regularly to maintain the integrity of your exterior paint. Use a high-quality exterior caulk to seal gaps around windows, doors, and other openings. Ensure the caulk is compatible with your paint and can withstand the outdoor elements. Sealing should be done as part of your regular maintenance routine, especially before the rainy season.

9. Protecting Your Home During Extreme Weather

Extreme weather conditions, such as heavy rain, snow, and intense sunlight, can accelerate the wear and tear on your home’s exterior paint. To protect your home during these conditions, take preventive measures such as installing gutters and downspouts to direct water away from the walls, and using awnings or shades to protect areas exposed to direct sunlight. Additionally, ensure that your home’s drainage system is functioning properly to prevent water from pooling around the foundation, which can lead to paint damage and other structural issues.

10. Choosing the Right Paint for Your Climate

The type of paint you choose plays a crucial role in the longevity of your home’s exterior. Different climates require different types of paint to withstand the specific environmental conditions. For example, in hot and sunny climates, UV-resistant paint is essential to prevent fading and cracking. In humid or rainy regions, mold and mildew-resistant paint is recommended to prevent fungal growth. If you live in an area with extreme temperature fluctuations, choose a paint that can expand and contract without cracking. Always consult with a professional painter or paint supplier to select the best paint for your climate.

11. Regularly Maintaining Your Landscaping

Believe it or not, your landscaping can impact the condition of your home’s exterior paint. Overgrown trees, bushes, and vines can rub against your home’s walls, causing paint to wear away over time. In addition, plants that are too close to the house can trap moisture against the walls, leading to paint damage and mold growth. Regularly trimming trees and shrubs, and ensuring that plants are at least a foot away from the house, can help prevent these issues. Consider installing drip irrigation systems to water your plants without splashing water onto your home’s exterior.

12. Consulting a Professional Painter

While many exterior paint maintenance tasks can be done by homeowners, there are times when it’s best to consult a professional painter. If you’re dealing with extensive paint damage, large-scale repainting, or issues related to lead paint in older homes, a professional can provide the expertise and tools needed to do the job correctly. Professional painters can also offer valuable advice on the best paints and techniques for your specific needs, ensuring that your home’s exterior remains in excellent condition for years to come.

13. Maintaining Wooden Surfaces

Wooden surfaces such as decks, porches, and fences require special attention when it comes to paint maintenance. These areas are often more exposed to the elements and can deteriorate faster than other parts of your home. Regularly inspect wooden surfaces for signs of wear, such as peeling paint, splintering, or discoloration. Sand down rough areas and apply a wood primer before repainting to ensure a smooth, long-lasting finish. Consider using stains or sealants specifically designed for outdoor wood to provide additional protection and enhance the natural beauty of the wood grain.

14. Using High-Quality Paint and Materials

The quality of the paint and materials you use can make a significant difference in the longevity of your exterior paint job. Investing in high-quality paint, primers, and sealants can save you time and money in the long run by reducing the frequency of maintenance and repainting. Look for paints that offer features such as UV resistance, mildew resistance, and weatherproofing. Additionally, choose brushes, rollers, and other tools that are designed for exterior use to achieve the best results.

15. Establishing a Regular Maintenance Schedule

Consistency is key when it comes to maintaining your home’s exterior paint. Establishing a regular maintenance schedule can help you stay on top of necessary tasks and prevent small issues from becoming major problems. Create a checklist that includes regular inspections, cleaning, minor repairs, and repainting as needed. By staying proactive, you can ensure that your home’s exterior remains in excellent condition, preserving its beauty and value for years to come.

In conclusion, maintaining your home’s exterior paint requires regular attention and care, but the effort is well worth it. By following these tips and establishing a consistent maintenance routine, you can keep your home looking fresh and vibrant while protecting it from the elements. Whether you’re preparing to sell your home or simply want to enjoy its beauty for years to come, proper paint maintenance is an essential part of homeownership.